1. Before proceeding, please ensure that both your Aurender system and Conductor app meet the following version requirements:
Conductor App: 4.23 or later.
If the version is lower, the 'Roon' feature will not be enabled or visible.System Software: 1.24.255 or later.
If the version is lower, the Roon button on the Conductor app will display "Requires Update".
Once these requirements are fulfilled, you're ready to proceed with activating the Roon feature.

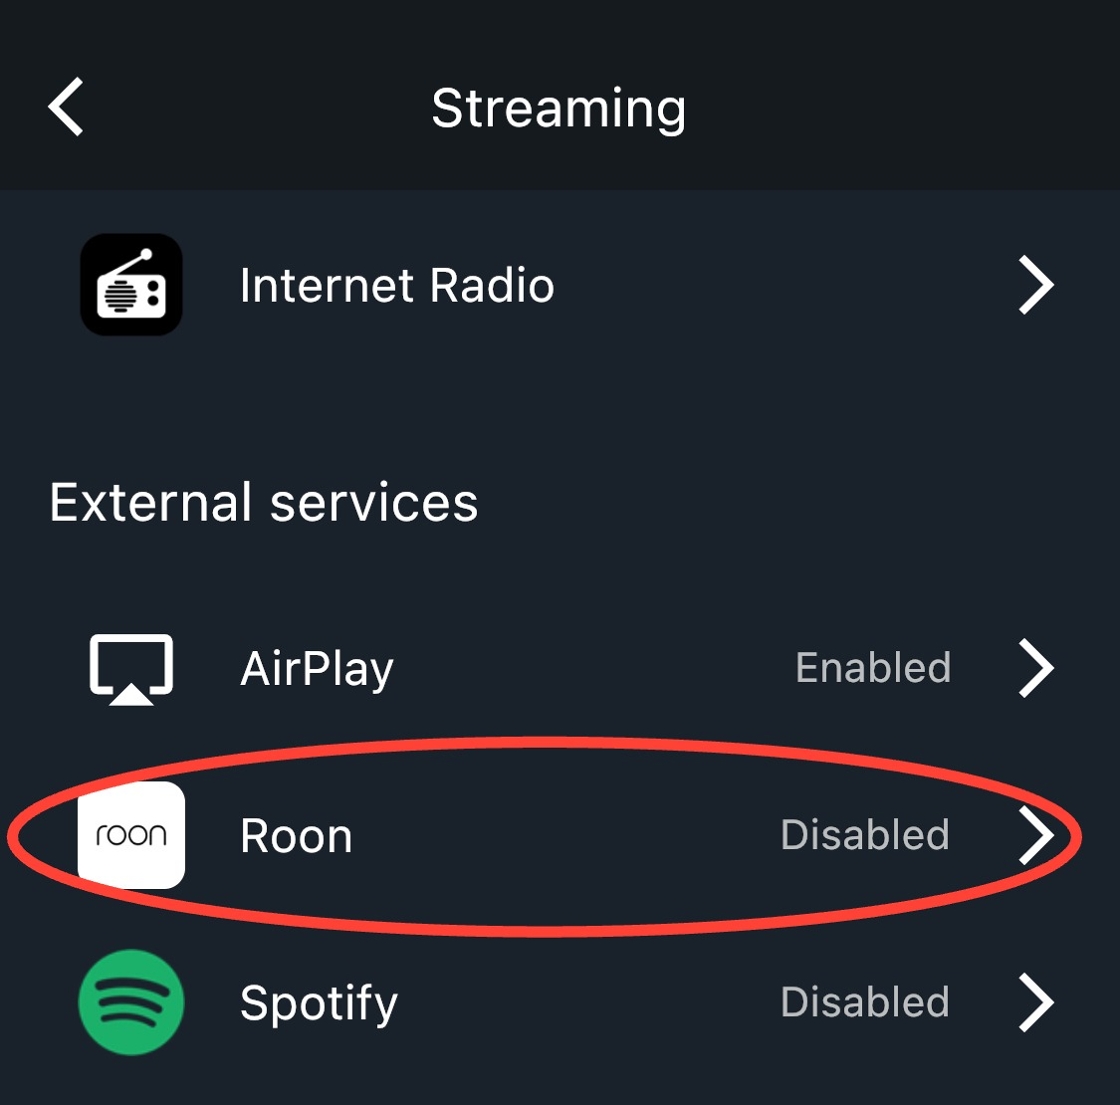
2. Go to 'Settings' and tap 'Streaming' from the menu.

3. If all the requirements from the first step are met, you will see the 'Roon' option, which defaults to 'Enabled'. If the 'Roon' option is 'Disabled', please switch it to 'Enabled' by tapping on the 'Roon' button.
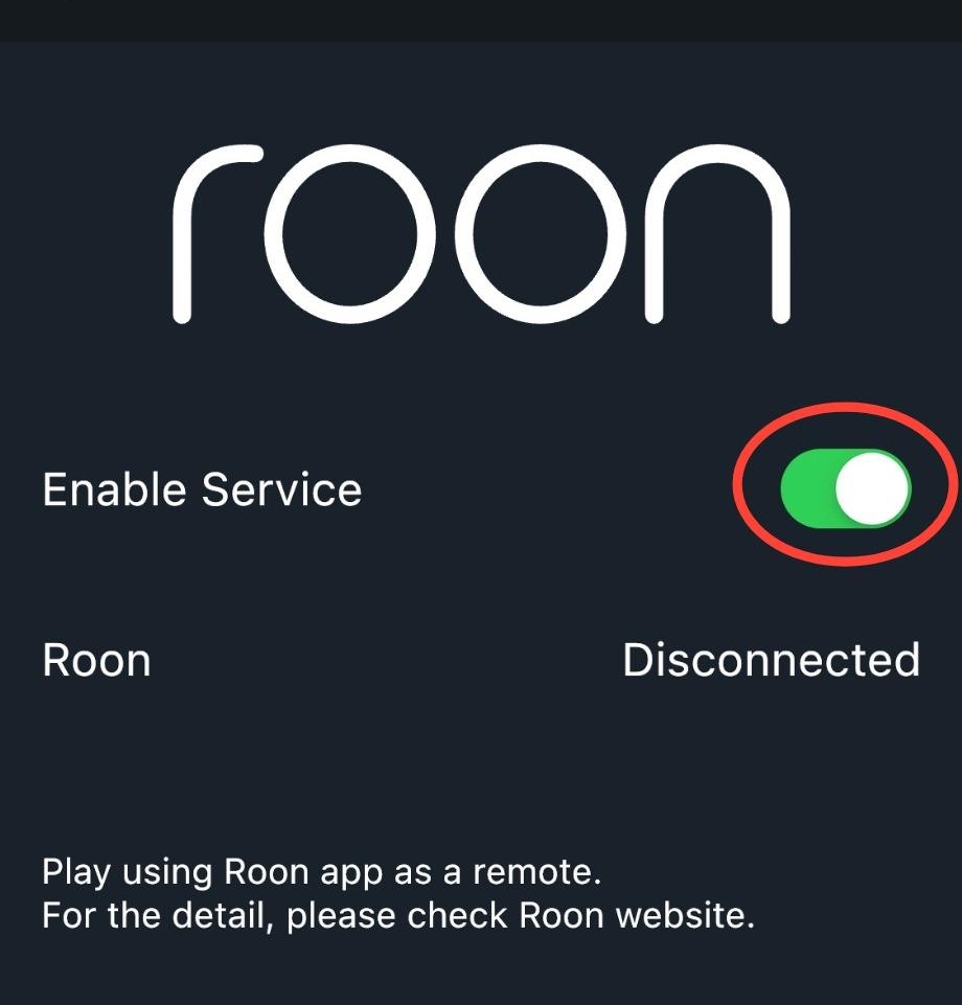
4. Tap the 'Enable Service' switch button to turn it on. If the switch button turns green, it means the Roon feature is enabled.
5. Select an output source. Options include USB and INT. The INT option includes COAX and Analog output.
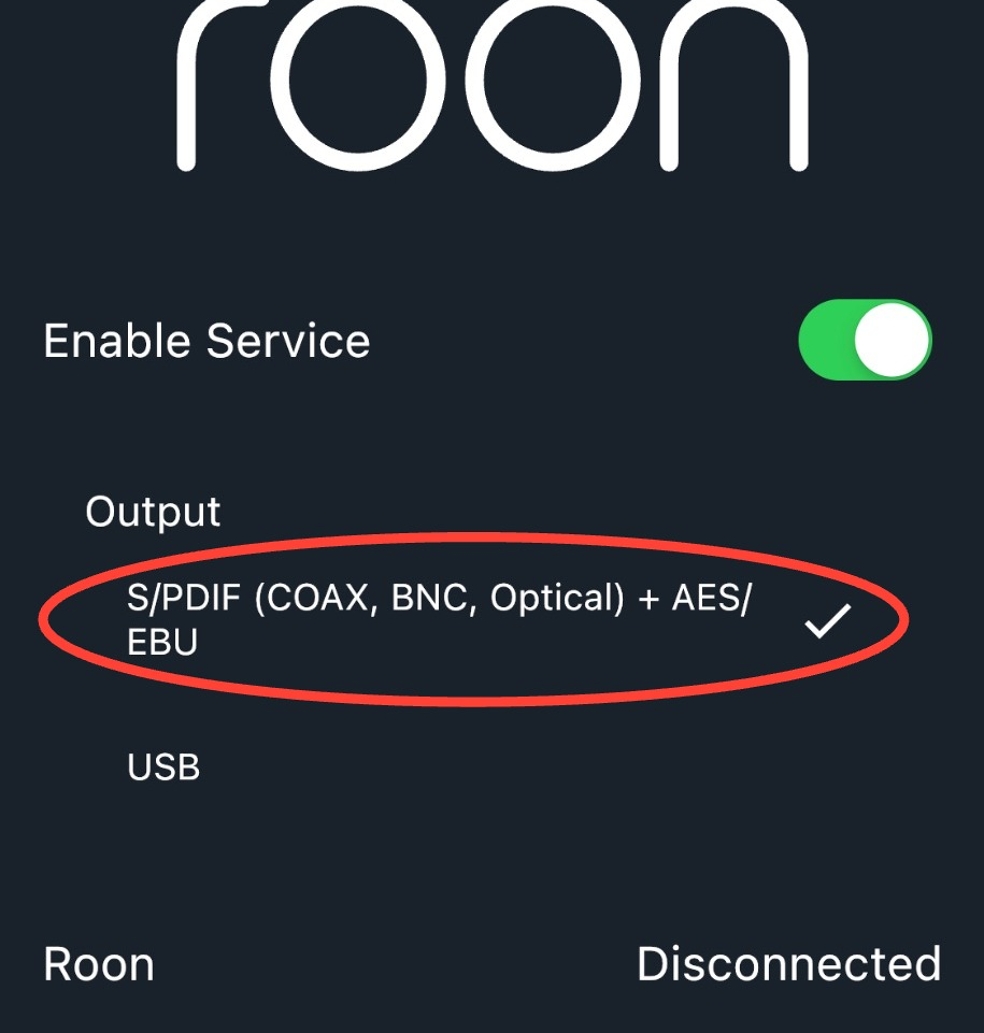
6. After selecting the S/PDIF + AES/EBU output option (which includes COAX and Analog outputs) from Settings > Streaming > Roon, proceed to set the corresponding output for Aurender in the Volume Control section.
Tap the 'Volume' tab at the bottom of the screen.

7. Ensure that the appropriate output option is set in the Volume tab based on your previous selection. For the Roon Ready feature, set the input to 'A1000'. Then, select the corresponding output option: 'Line out' for Analog output or 'Digital Output'(COAX).

8. After enabling the Roon feature in the Conductor app, proceed to enable your Aurender device within the Roon application. The screenshot below shows the 'Audio' tab under 'Settings' in Roon, where you'll find sections like 'Audio', 'Roon', 'Roon Ready', 'Roon Tested', and 'Other network devices'. Locate your Aurender device under the 'Roon Ready' section and tap 'Enable'. Note that in the Roon app, you can separately enable both the INT output and USB output options for A1000. When you select an output in the Aurender Conductor app (Settings > Streaming > Roon), each corresponding option will appear in the 'Roon Ready' section, and you should enable each one individually.

9. After tapping the 'Enable' button, you'll have the option to set a name for your device. If your Aurender has multiple output sources, it's recommended to include the output source in the name to avoid confusion when switching output sources later. For example, if your model is A1000 and you have selected an output source as "S/PDIF + AES/EBU", you might name it "A1000_COAX+Analog". Of course, you are free to choose any name that you prefer.

10. You can now select your Aurender as an audio device from within the Roon application and start playing music. For both Digital Output and Analog Output configurations, you will see this option available.

11. If you want to switch to another output source, you should make this selection from within the Conductor app. As shown in the screenshot, 'USB' has been selected as an example from Settings > Streaming > Roon.

12. Next, ensure that the USB output for Aurender is set in the Volume tab. Please note that this option will not be available if no USB DAC is connected.

13. Once you’ve ensured the USB output source is selected in the Conductor app, navigate to the Roon application. Go to the 'Audio' tab under 'Settings' and locate your Aurender device in the 'Roon Ready' section, as shown in the screenshot below. Finally, tap the 'Enable' button for the newly switched output interface.

14. Similar to step 7, to avoid confusion, it's recommended to set a name that includes the output interface. For instance, if you've switched to the USB interface, you might name it "A1000_USB". Of course, you're free to choose any name that suits your preferences.

15. You are now ready to enjoy your music. Select the newly switched output source of your Aurender as an audio device from within the Roon application and start playing music.

16. Note: Whenever you switch the output source on your Aurender, always remember to check the corresponding input selection on your DAC and make sure the correct cable is connected as well. This will ensure a smooth and trouble-free listening experience.