Last updated: Nov 2025
1. Key Features
| Function | Description |
|---|---|
| Backup | Copy all audio data from the internal drive to your NAS. |
| Restore | Recover previous backup data back into your Aurender device. |
| Pause / Resume | Temporarily pause ongoing backups to maintain playback performance. |
2. Before You Begin
You’ll need:
An ACS device (e.g., ACS10, ACS100) or A30 with internal storage.
A NAS device connected to the same local network.
Tips & Precautions:
Avoid turning off your ACS or NAS during backup or restore.
Backup processes may use more CPU / network resources — pause if you notice playback dropouts.
3. Performing a Backup
Step 1 — Select the target NAS folder

In case you cannot browse your NAS on the list, you can add by entering the IP address of the NAS.
Step 2 — Get the backup preview
Tap Backup.
ACS analyzes your library → lists:
Backup size
Total number of files
Backup file list - files to be transferred
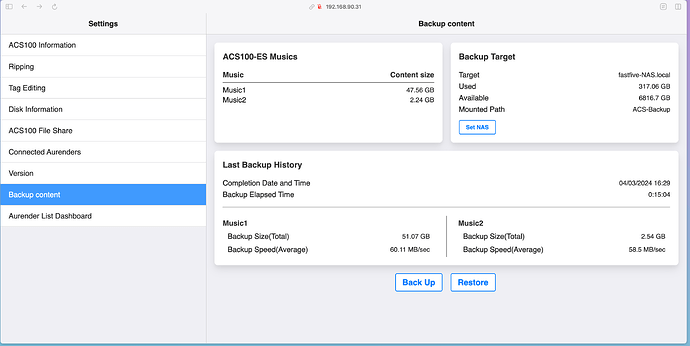
Step 3 — Start Backup
Tap Start Backup to begin transfer.

Once complete, you'll see the backup history and related information on the same screen.
4. Restoring from NAS
※ Restore from NAS is only possible when there is at least one backup history.
On the main screen, tap Restore.
Check the preview:
Current ACS usage vs restore data size
List of files to be restored
Tap Start Restore.
Monitor progress (similar to backup view).
Wait for completion before accessing your library.
❓ FAQ
| Question | Answer |
|---|---|
| What happens if power or network cuts out mid-backup? |
|
| Can I cancel a backup? | Yes, but files already transferred stay on the NAS. |
| Deleted ACS files synced to NAS? | No. Backup is add-only — it never deletes from NAS. |