⚠️ Setting up a static IP requires a certain level of network knowledge. Any mistakes may affect other devices on your network. Proceed with caution.
Static IP configuration is not available on the A1000 and A1. If you own one of these models, this guide does not apply.
1. To set up a static IP address on your Aurender, you will need a laptop or desktop PC. The setup involves accessing a webpage via a web browser. Please ensure that both the Aurender and the PC you're using to open the web browser are connected to the same network.
2. Verify the IP address of your Aurender. You can access this information by pressing the menu button on the front panel (press several times to swtich the front display information), or under Conductor > Settings > Help > System Information. Open a web browser on your PC and enter {Aurender_IP}/network in the address bar. Replace {Aurender_IP} with the actual IP address of your Aurender. (Example: 192.168.0.22/network)

3. Upon navigating to 'Aurender_IP/network', you will be presented with the 'Network Wizard for Aurender' page. On this page, you will see a table displaying current network settings, including IP Address, Gateway, Netmask, DNS1, and DNS2. These represent the network settings currently assigned to your Aurender device.
Here, you should change the IP Type from 'DHCP' to 'Static IP' by selecting the latter from the drop-down menu provided.

4. Once you have selected IP Type to 'Static IP', you'll find fields labeled 'IP Address (for Static IP)', 'Gateway (for Static IP)', 'Netmask (for Static IP)', 'DNS1 (for Static IP)', and 'DNS2 (for Static IP)'. These are the details you need to input based on your specific network requirements. Please note that the values displayed in the following screenshot are purely illustrative. You should input the values suitable for your specific network.
Once you've carefully filled in all the necessary details, click the 'Apply' button to save these settings.

5. After clicking 'Apply', a message stating 'Aurender will be turned off and on' will appear. This indicates that your Aurender is restarting with the newly set static IP address.
6. If you wish to switch back from Static IP to DHCP, simply change the IP Type field to 'DHCP' and press the 'Apply' button.

7. Alternatively, if you are unable to access the Network Wizard page due to a setup issue, you can switch back to DHCP by pressing the hotkey on the front panel of your Aurender.
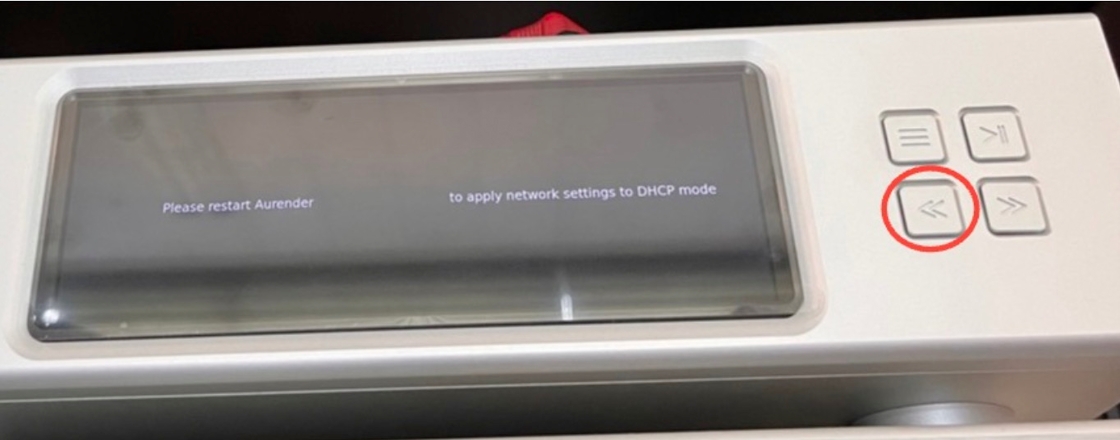
For detailed instructions on this process, please refer to this article: Switching Aurender Network Settings from Static IP to DHCP (x.23.316 and Later)